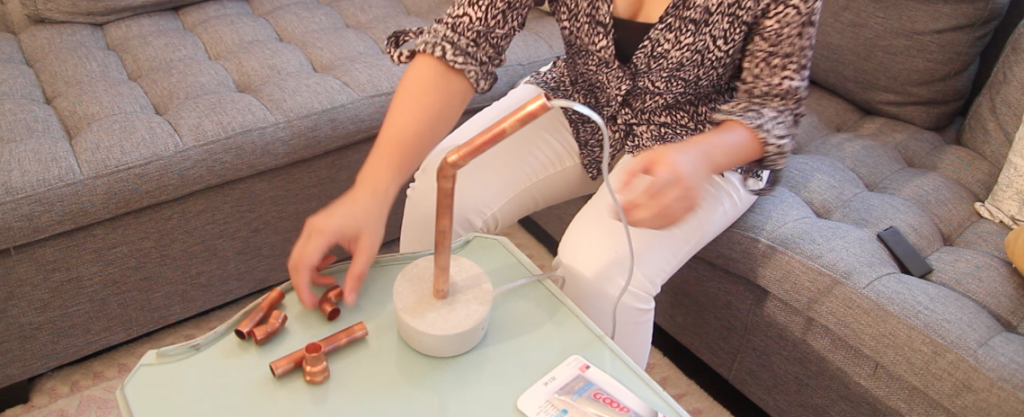
DIY Concrete and copper pipe lamp

blogcovercopperlampI’m absolutely loving this concrete trend that is happening right now. After noticing a couple of different copper pipe lamps on Pinterest, I decided to try making my own.

It ended up being a lot easier than I had anticipated and I love the industrial feel it adds to my room.

Materials

Body:

  • Copper pipes – The length will be dependant on how tall you want your lamp to be. I used 22 inches of copper pipe
  • Copper elbows – dependant on the shape you want. I used one 90 degree elbow and two 45 degree elbows.

Base:

  • Concrete or mortar mix and enough water according to the instructions on your mix
  • an empty container – I used an ice-cream container but using something with a waxy interior is preferable
  • Furniture feet protectors (or anything you can use to raise up the base. I used wine stoppers but corks would also work really well!)

Electrical:

  • wire with plug
  • lamp holder (mine has a turn switch on it to make it easier to turn on and off)
  • Light bulb (The edison light bulbs complement this lamp well!)

Tools

  • Needle nose pliers
  • scissors
  • all purpose glue (I used amazing Goop but have heard great things about Gorilla glue)
  • toilet paper and paper towel rolls. If you don’t have this, just use paper or card stock
  • plastic wrap

cementlampmaterials

Instructions

  1. Cut your toilet paper and paper towel rolls in half and roll them into tubes. You are going to use these to test out different shapes for your lamp. You can cut the tubes shorter to change the shape by sticking them in the elbows. Keep adjusting until you find something you like.screen-shot-2016-10-20-at-2-38-55-pm
  2. Once you’re happy with the shape of your lamp, use these toilet paper rolls as a way to mark how long each of your pieces need to be and use a pipe cutter to cut them into the sizes you need. If you want yours to be exactly like mine, you’ll need four copper pieces, a 6 inch, two 5 inches and a 2 inch.measure copper pipe
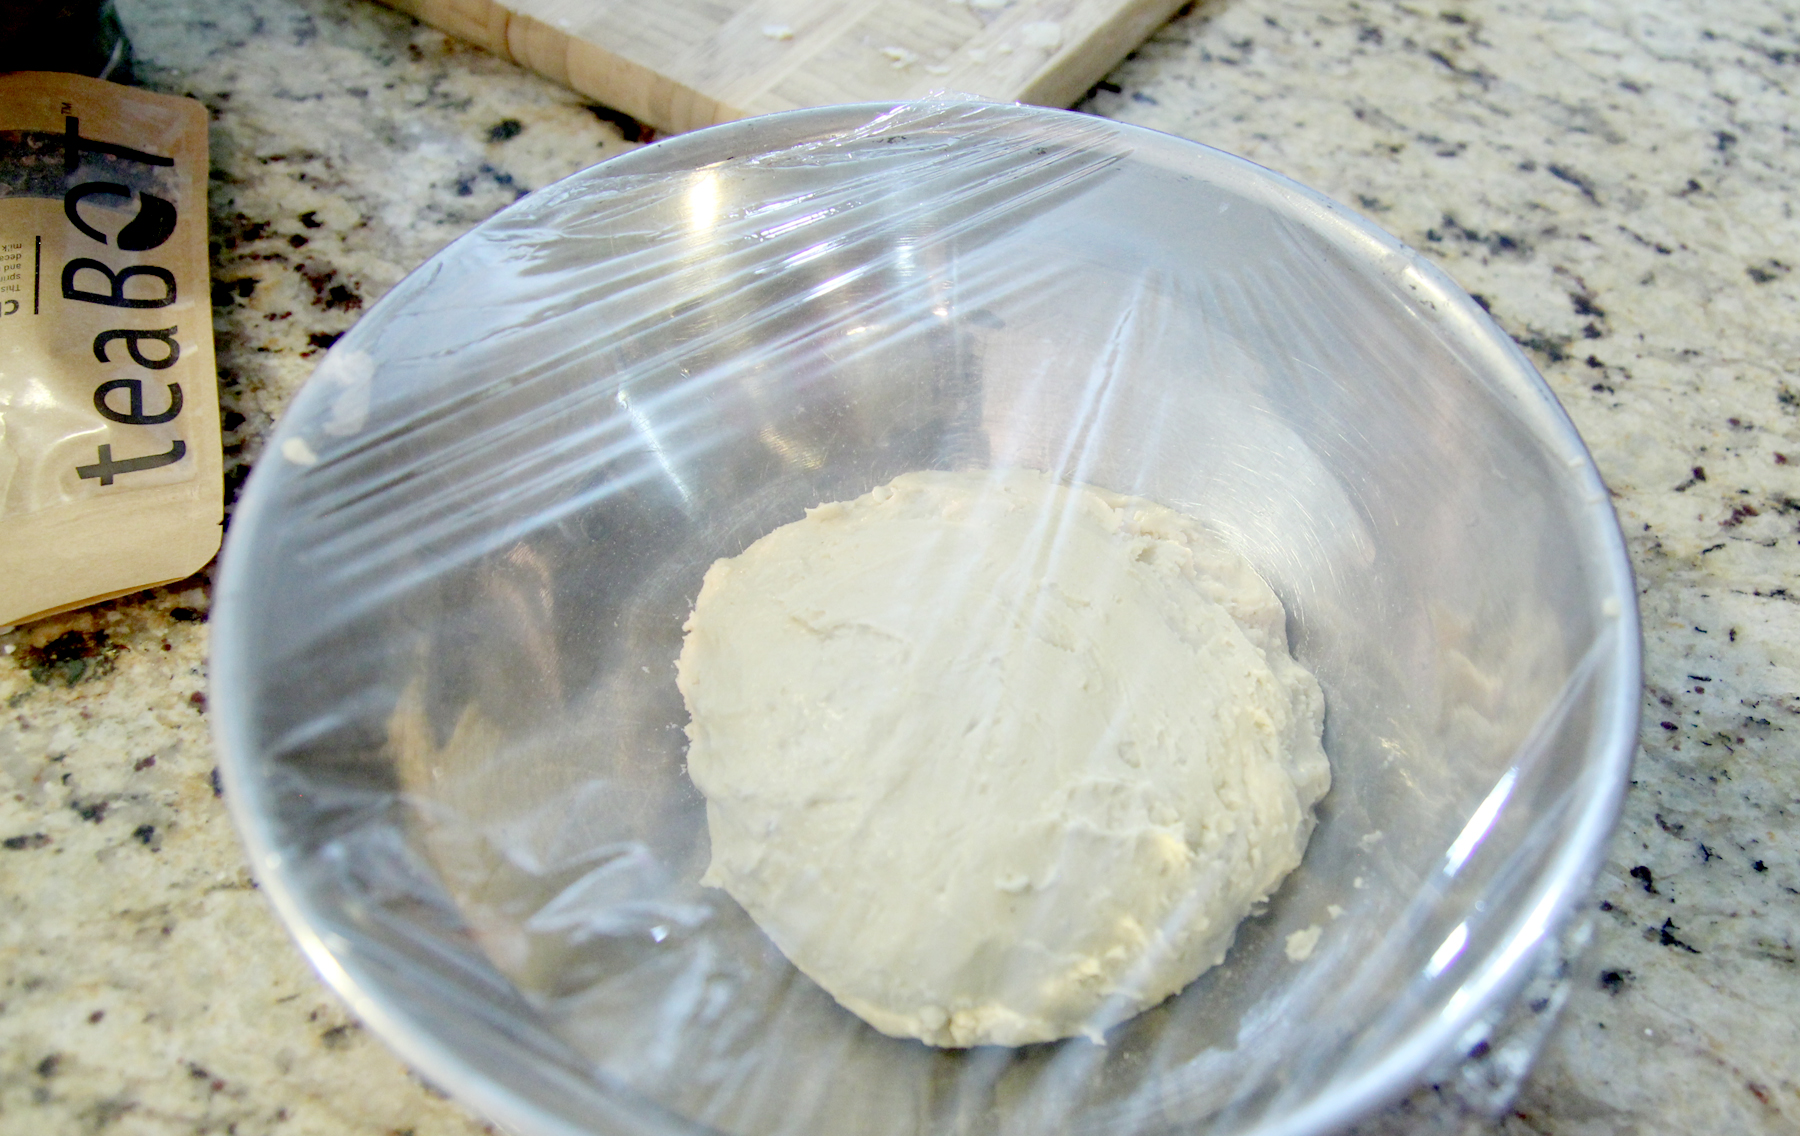
  3. Take the copper pipe that is facing the bottom of your lamp and cover the end with clear plastic wrap. This will prevent any concrete from getting inside the tube while you are casting your base
  4. Grab a clean container. I’d recommend using something disposable as there’s no guarantee that you’ll be able to salvage the container. If I did this again, I’d probably use something wider than my ice-cream container. It ended up being a little small for my lamp.
  5. Tape the copper pipe into place so it stays where you want it to be. Make sure the end that’s covered in clear wrap is facing down.screen-shot-2016-10-21-at-2-10-32-am
  6. Mix your concrete according to the package. I used a quick mix and did a 4 to 1 ratio. The mixed concrete had a room temperature peanut butter like consistency. Remember, if you add too much water, it will take a long time to cure, but if you don’t add enough, your base will not be as solid.mixcement
  7. Add the mixed concrete to the container. Mine was about 2 inches tall but you can customize this based on what suits your lamp best.
  8. Jiggle and shake the container a bit until your concrete settles. This will help remove any excess air bubbles. Make sure your copper pipe is standing up straight and leave it somewhere to cure/set over night. *FUN FACT! The water in the concrete isn’t actually evaporating! The water and concrete mix is going through a chemical reaction which is why we say it’s setting/curing instead of drying.
  9. Once your base is dry, gentle take it out of the container. With mine, I just cut off the ice-cream container.
  10. If your base is a bit rough, you can take some sand paper and sand down the edges. If you can’t see your copper pipe through the bottom of your base, you should be able to break through that thin layer of concrete and plastic wrap.sand-concrete
  11. Grab your wire cord and string it through the bottom of your lamp and start putting the copper pieces back together in the shape that you want.putting-lamp-together
  12. String the wire through the bottom of the lamp holder and then tie a knot with the wires to prevent it from slipping out of the lamp socket.tieknotincord
  13. To wire your lamp, read the instructions on your lamp holder and wire to make sure you understand which one is the hot wire and which one is the neutral wire.
  14. On mine, the neutral wire has ridges that you can see and feel with your finger. You want to take your needle nose pliers and make little hooks on both the hot and neutral wire.ridgesoncord
  15. Unscrew the screws on your lamp holder but not so much that the screws come out. Find which screw on your lamp holder goes with the neutral wire. You want to take the neutral wire with the hook going clock wise and hook it on to the corresponding screw. Then screw it tightly into place.
  16. Do the same thing with the hot wire and then put your lamp holder back together. Screw on the light bulb and plug it in to make sure it works.
  17. If it works, you can take apart your copper pieces and use the glue to glue all the copper pieces together and the lamp head together.gluecopperpipe
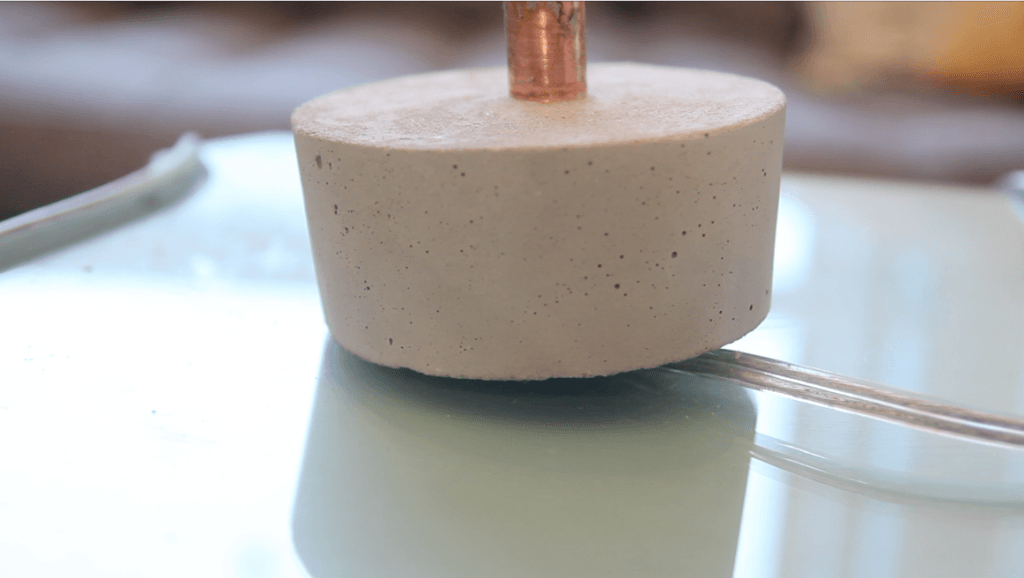
  18. You’ll notice that your lamp doesn’t sit flat on the table because of the cord. Use some furniture protectors to raise the base off the ground slightly so there’s room for the cord to move around.concretelampbase
  19. And that’s it! You’re finish! Enjoy your new industrial looking concrete and copper pipe lamp!

Check out my Youtube video for step by step instructions!

If you have any questions, leave them below and I’ll try to answer them.


A week in the Azores – Ponta delgada

Before booking my flight to Ponta Delgada in the Azores, I had never even heard of these islands. Within a couple hours of landing, I quickly fell in love with everything it had to offer.

I’m constantly raving about how wonderful the island is and how I would recommend it as a destination for all ages. Downtown has a wonderful European charm about it, some of the more rural areas have this old world farm feel, the little neighborhoods scattered around the island have this wonderful small town feel and then then the cherry on top is that surrounded by oceans, the greenest fields, and the freshest air.

ocean views in the azoresDowntown ponta delgada

img_0109-copysmalll

Friends are always asking for suggestions on what to do there so I thought I’d share it here on my blog.


Rent a car

The public transportation on this island is infrequent and does not always run on schedule. You can go end to end of this island in 3 hours and there are so many beautiful look out points that you really want a car to be able to experience it all. We found that renting a car from the city was cheaper than renting from the airport. If you are visiting during high season, you may want to book a car ahead of time as we weren’t able to rent a car until our second day because every place was sold out. We also found that we were able to get some better prices by booking online rather than in person. Hopefully you can drive standard as an automatic car will run you about twice as much.

The cars are pretty small and are great on gas. We used about a tank and a half for the while time we were there. And we were out driving in the car every single day.

We rented from flor do Norte Rent-a-car and it was 173 euros total for 8 days.

Phone: 296 287 209 | Mobile: 966 506 551 / 963 827 567

rent car azores

Look at how adorable our little car is! We only had to fill up once and we drove everywhere for a whole week.


Rent a scooter!

Although the idea of zipping through the island on a scooter sounded like so much fun, we didn’t end up renting one as the weather was very unpredictable and there wasn’t a lot of room on the scooter for all the snacks we would bring and we couldn’t lock up our stuff.

Activities

Tea plantations

Since the boyfriend and I are both tea lovers, we spent a day visiting both tea plantations and learning about how they harvest their teas using traditional methods. These plantations are absolutely beautiful so even if you’re not a tea drinker, I’d still recommend visiting.

There are two on the island:

Cha Gorreana and Cha porto formosa


visiting tea plantations in the azores

Nordeste Canyoning

Dionisio Cardoso from Azores Adventure islands was amazing and we ended up booking most of our activities through him. I’m a big wimp when it comes to heights but once I repelled down the first waterfall, I quickly fell in love. It’s exhilarating without giving you that falling feeling in your stomach. The only part of this tour that you should be aware about is that there are a few little cliff jumps ranging from 3 meters to 9 meters. The 9 meter jump was terrifying and although I’m proud of myself for doing it, I will never voluntarily do it again.

Canyoning in the Azores10339375_10100893305381877_3594041231280472684_o

Repelling in the Azores

Kayaking

Kayaking was a good work out but also very relaxing at the same time. We chose to kayak in Sete Cidades though Azores Adventure islands as well. The ride there was very scenic and went by super fast. We ended up kayaking on a pretty windy day so we really had to use some muscle to get to where we wanted to be.

Kayaking in the Azores

10498498_10100893279234277_2521581633781898364_o

imgp0663small

Surfing

If you already know how to surf, you can rent boards from some shops right on the beach for fairly cheap. If you don’t know how to surf, you can also book lessons with the surf shops. I think we paid about 50 euros for Brian’s lesson. The waves can vary a lot from day to day so it’s a good idea to email one of the surf shops to ask them how the waves are if they recommend surfing in the north or south of the island that day based on your experience level.

Surfing in the Azores
Islet of Vila Franca do Campo
This is a cute little island off the coast of Sao miguel that you can get to by boat. It’s a nice place to swim and relax for a couple of hours. Make sure you check the boat schedules though. The first time we tried to go, we found out that the boats were not running that day.

ponta delgada island
Hot springs

Sao Miguel has several natural geothermal hot springs. We went to Poça da Dona Beija and it was beautiful and relaxing. Entrance is pretty cheap at only 4 euros per person.

Poça da Dona Beija hot spring

Natural pools

All around the island, you can find these really neat natural pools where rocks have closed off an area of the ocean so you have a calm body of water to swim in for free. Since it is ocean water though, be prepared for pretty cold water. Even in June, the water was absolutely freezing.

Ponta da Ferraria
Ponta da Ferraria is on the western tip of Sao Miguel. There’s also a nice natural swimming pool here that’s warmed by a hot spring. Although you’ll want to go here when the tide is low or it’s not too windy because the waves can be pretty aggressive especially for a beginner swimmer. The place is also covered in dark lava rocks and is a great place to hang out and relax for a couple of hours.

Food

Seafood, and beef are ridiculously good on this island. For a well-priced steak, I’d highly recommend Galago. The restaurant was full of locals when I went and almost every single table had a steak on it so you know it’s good!

They also had these delicious limpets! I had never heard of these before eating them. They were kind of like chewy mussels.

For fresh seafood, check out cholera. It’s right on the water and offers a spectacular view. And the menu changes depending on what the catch of the day is.

Volcano stew

In Furnas, you can get a their speciality meal, cozido das Furnas, cooked using steam from the volcano!  They throw a bunch of meat and veggies in a pot and leave it in the hole for 5-6 hours.
This is actually a serving for one person! The server kept insisting that we order a two person serving bc he didn’t think we’d have enough food. WHO EATS THIS MUCH?!

Accommodations

Although there are lots of hotels to stay at, I would highly recommend checking out airbnb. You can get a really fantastic place for fairly cheap comparatively.

We opted to stay with a really nice couple and their kid. Their hospitality was top notch. We woke up every morning to a full breakfast that included fresh breads, home made jams, different cheeses and fruits, juices, milk, coffee, eggs.

airbnb

I don’t think you can go wrong with whatever neighbourhood you choose to stay in. Every inch of this island was really lovely and all the locals I met were so friendly and warm. The one thing you may want to consider though when choosing where to stay is that some tours include a pick up and drop off but only in certain neighbourhoods. This could save you money on a car rental if you plan on doing a lot of full day tours.

Engagement photoshoot – Cherry beach

Warmer weather means more outdoor photoshoots. For this engagement session, we headed down to Cherry Beach. I love this location because it has so much variety from sandy beaches, to lush green trees, to worn out buildings. It’s also close enough to Polsen pier if you want to make a quick stop to take some photos with the Toronto skyline in the background.

Here’s a sneak peek from my first engagement shoot of the season. Cheers!

IMG_0365-2bwsmallIMG_0337-77 copyIMG_0037-13smallIMG_0309-7bwEngagement photo with bubbles in toronto

Hope you like the photos! Thanks for visiting.

xox

ngoc

Elephant Jungle Sanctuary – Chiang Mai, Thailand

elephantJungleSanctuarycover
I’m notorious for not planning anything when I travel but the one thing that I did spend time researching and reading about before my trip were these elephant parks all around south east Asia. I’m always a bit iffy about going to places with animals for pure human enjoyment. I had heard about the mistreatment of elephants and tigers in Thailand so had initially decided not to visit one until I heard about these ethical rescue centres.

After a lot of research, I had decided that Elephant nature park and the Elephant Jungle Sanctuary both had good reputations for treating their elephants with care and respect.

I ended up booking a full day tour at the Elephant Jungle Sanctuary and had an amazing experience. They have a no-ride policy and their elephants are free to roam around without chains and are not held in cages and are not disciplined using bull hooks. The elephants don’t put on shows or entertain the guests. I’d describe the day more like the elephants were just hanging out and we got to experience the day with them.

The full day started with a pick up from my hostel at 8am. We rode in a songthaew which is a typical mode of transportation in Thailand. It’s essentially a pick up truck that’s been altered to carry a bunch people in the back.

The ride to the sanctuary took a little over an hour and a half. The driver’s drive pretty fast and the roads get pretty bumpy especially driving up the mountain so you’ll have to hold on tight.

When we first get there, we learned a little bit about the village and why elephant riding is very discouraged. We learned a little bit about the elephants that live in that village and then we made some little elephant snacks that were full of vitamins.

12916916_652351271587560_5809017482082812383_o

11906812_652350811587606_7608624508342256112_o (1)

We then carried the elephant snacks and the bags up bananas up to where the elephants were hanging out.

12967987_652353641587323_3235812428016957728_o

They gobbled up the food really quickly and then we followed them as they walked through the jungle for a bit.

The elephants decided to stop at this mud pit and spent a good 20 minutes just rolling around in the mud. Except for the gramma elephant. She wasn’t too interested in the mud. Instead she walked off and hung out near some dried bamboo plants and kept on feasting.

After taking a few pictures of the elephants, we left them for a bit to go have some lunch.

After lunch, we changed in to our bathing suits and got ready to have a mud bath.

12973430_652356721587015_1526707416211807966_o 12473960_652360914919929_2029358566919985074_o

After the mud bath, we headed over to the river to wash off the mud. Again only 3 of the elephants wanted to go in the water while the other one kept playing in the mud off to the side by itself.

12970890_652365284919492_5507973500014952859_o 12901528_652365428252811_9160435364719743209_o copy

All in all in was an incredible day, made even more enjoyable by our amazing guide, Robert! image1-2

If you want a closer look of my day, check out my gopro video!

Doubt kills dreams – Free printable

So often I’ve realized that so often, I only did new things if I felt confident that I could succeed. I often felt embarrassed when I failed at something and I let that fear of failure hold me back.

So when I saw this quote by Suzy Kassem, I wanted to add it my personal collection. Here’s a free printable of the quote I have at home to keep inspiring me to go forward, and try things with an open mind, and appreciate the failures along with the successes. Doubt Kills More Dreams than Failure Ever Will.

Download now

DIY Tissue paper tassel garland

DIY Tissue Paper Tassel Garland
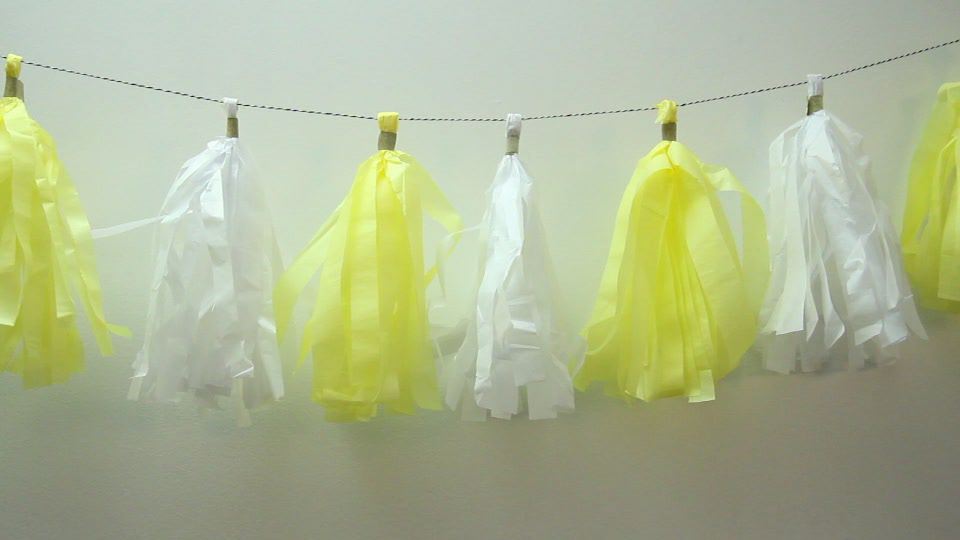
I’m a big fan of party decorations and I’m always looking for ways to make a big impact on a small budget. These tissue paper tassel garlands are super cute and can be made with so many different colours to match your party theme.

Materials

  • tissue paper
  • string
  • scissors
  • tape

Materialsfortissuepapergarland

Step 1. Take one piece of tissue paper and fold it in half one way and than again the other way. This will give you 4 layers of tissue paper.

tissueimages 4tissueimages 7
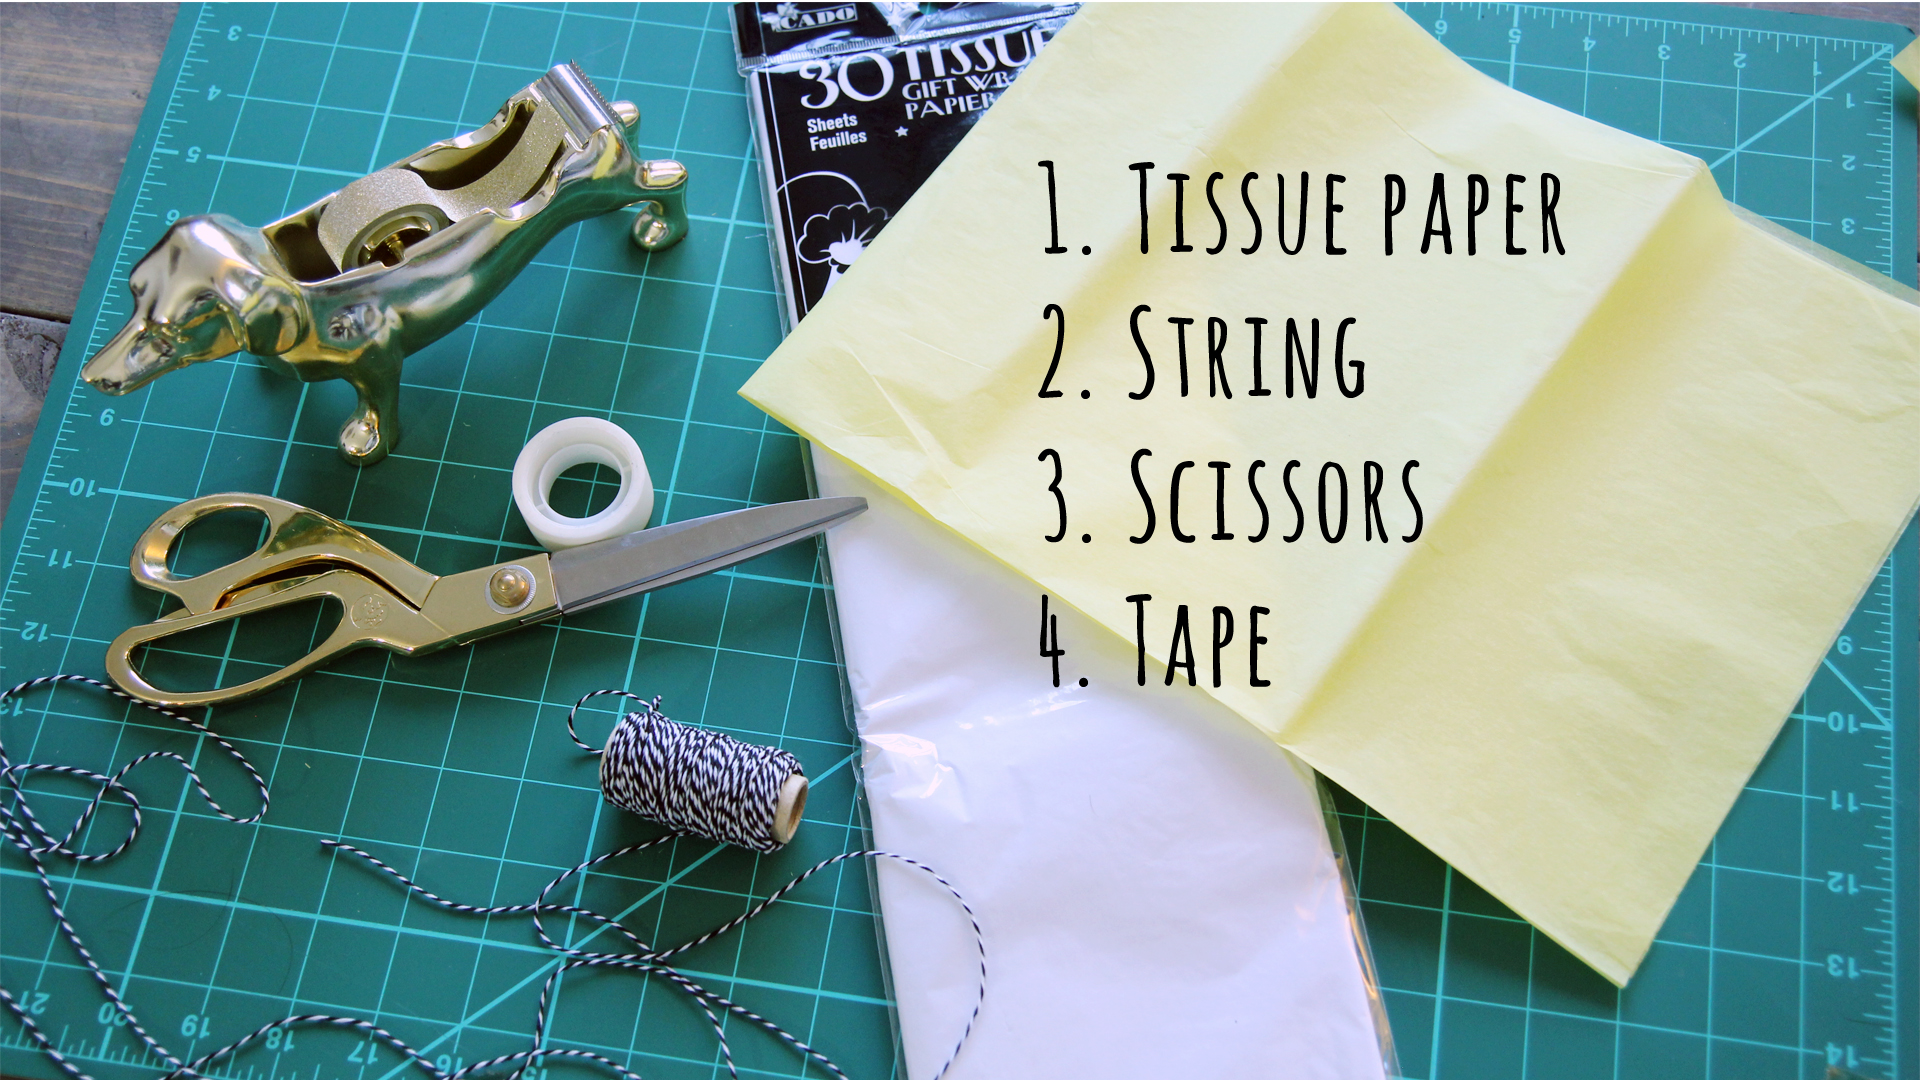
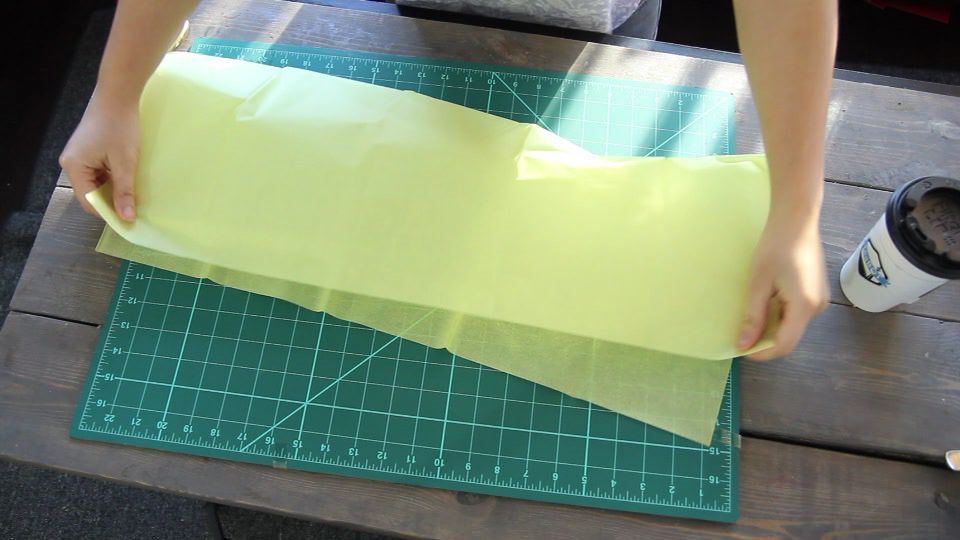
Step 2. With the folded edge away from you, cut strips into the tissue paper, leaving about 1 inch at the top. Make sure to cut through all 4 layers. tissueimages 04Step 3. Once you’ve cut all along the length, gently unfold your tissue paper and cut this piece in half along the crease. You will now have two pieces of the tissue paper.

tissueimages 06
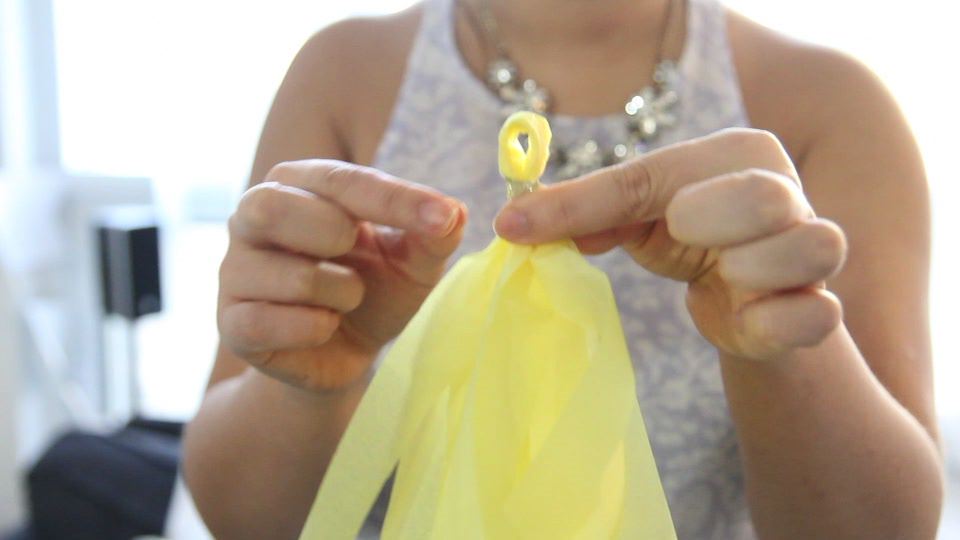
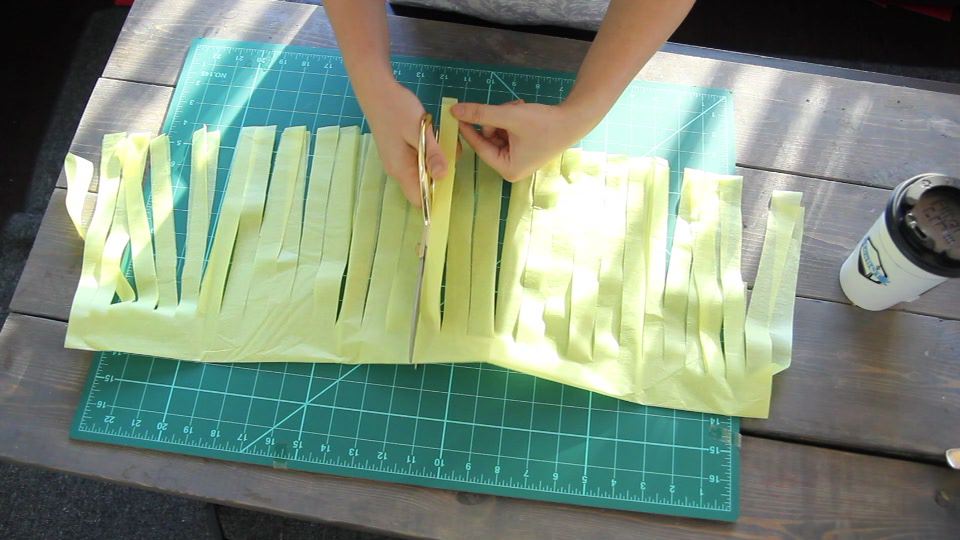
Step 4. Each of these pieces will make one tassel. Now take one of the pieces and gently open it up. Lay all the strips down flat and tightly roll up the tissue paper along the crease.
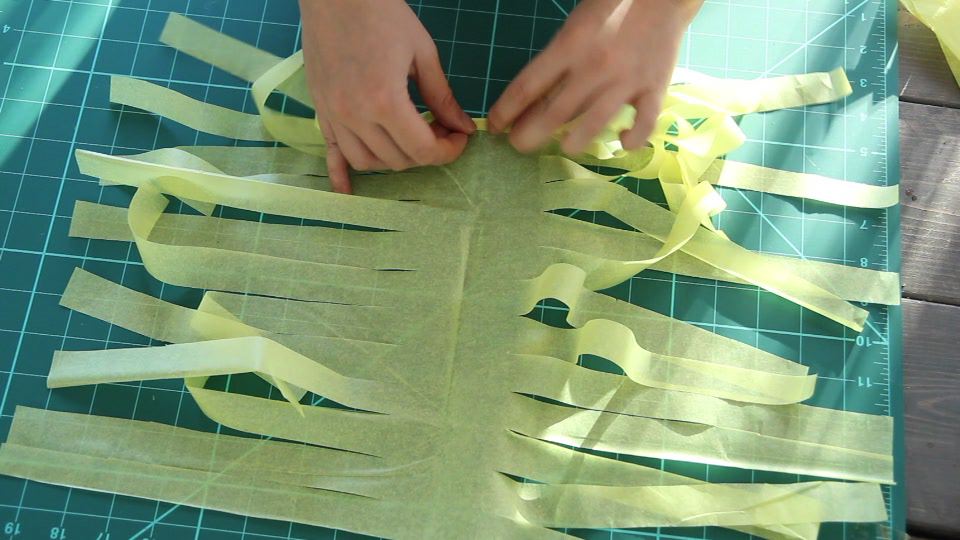
 tissueimages 09

Step 5. Once it’s all rolled up, fold it in half and create a loop. And you can either twist the tissue paper or use some tape to keep it in place.tissueimages 12

Step 6. Now just put it on some string and hang it up!tissueimages 15

To see the full step by step tutorial on how to make tissue paper tassel garlands, check out my Youtube video!

2015 Highlights

I’ve started making a habit of regularly taking the time to reflect and appreciate just how lucky I am and how wonderful life is. And there’s nothing quite like go over old pictures and videos to help keep my humble and motivate me to keep trying to make the out of life.

2015 was full of babies, weddings, travels and so many great friends. Thank you to everyone who has always supported and encouraged me and have given me the confidence to be unapologetically myself.

Here’s a little video of some of my favourite moments and events from 2015.

[fbvideo link=”https://www.facebook.com/ngoc5/videos/10101448642237367/?l=5199387387223014712″ width=”500″ height=”400″ onlyvideo=”1″]

Let’s make the rest of our lives, the best of our lives!

xox ngoc

Tea flavoured shortbread cookie recipe

blogcoverphoto

Hey guys!

I’m a big tea drinker so when I learned about  infuse butter to add tea flavour in to your baking, I had to try it! I used a simple shortbread cookie recipe and infused it with a Choco Cherry tea from teaBOT but it’s amazing with any quality chai or black tea.

Ingredients
1 ½ cup flour
½ cup icing sugar
1 cup butter
¼ cup cornstarch
3 tbsp of teaBOT Choco Cherry Tea 
ingredients
First thing you will need to do is infuse the butter with tea.

  • Melt the butter over medium heat and add the tea
  • Stir so that the tea is immersed in the butter
  • Let simmer on low for at least 6 mins
  • Strain using a fine mesh sieve to remove the tea leaves strainbutter

Your butter will be liquid at this point. Leave it to solidify. You will need it to be at room temperature to use so if you want to speed up the solidifying process by putting it in the fridge, you will need to leave it out to soften to room temperature before using.  solidifiedbutterPreheat oven to 350 degrees F.

In a bowl, cream together the butter and sugar. Once that is mixed well, add the cornstarch and flour. If you didn’t use salted butter, than add a 1/4 teaspoon of salt as well.

Mix until the batter is just crumbly. Careful not to over mix or your cookies could become quite dense.

When the batter is crumbly, remove from the bowl and finish kneading it together with your hands. You may need to add a bit more flour if you find it is sticking to your hands too much.

crumblyshortbreaddough

Now cover and let it cool for at least 30 mins in the fridge.

chillshortbreaddough

One a parchment paper lined cookie sheet, roll the batter in to little balls and lay them out on your cookie sheet.

Use a fork to flatten the cookies.

Bake in the oven for 12-18 mins and remove when the bottom and edges are just starting to get golden.

That’s it! Cheers!

You can also see the whole process in the following video!